

Anyone who knows me or has been following this blog, knows that I THRIVE on the challenge of doing my best to make the majority of everything my family eats from SCRATCH!
I'm so excited that I finally perfected making Homemade Buns and
WOW, they are so chewy and yummy and we will definitely not be purchasing store bought buns again, if we can help it.

If you were to ask me what my favorite gourmet bread or bagel is, it is hands down, Onion and Cheese.
When my Ethan Kip asked for Salmon Burgers for his birthday dinner, I decided to try making homemade buns.
So, I took my favorite French Bread Recipe and then added in dried minced onions to the dough and then shaped the dough into large rolls, topped them with a yummy cheese mixture of grated Parmesan and Asiago Cheese and WOW, they truly taste better than any bun you could purchase at any gourmet bakery.
AND the ingredients for the basic dough are less than $1.00 to make these.
Here is a breakdown of the cost:
6 cups of flour--.42 (7 cents per cup of flour)
2 Tbsp. yeast-- .17
3 Tbsp. Sugar-- .21
2 tsp. salt-- .06
1 Tbsp. oil-- .12
........................................
Total-- 98 cents for the dough
6 cups of flour--.42 (7 cents per cup of flour)
2 Tbsp. yeast-- .17
3 Tbsp. Sugar-- .21
2 tsp. salt-- .06
1 Tbsp. oil-- .12
........................................
Total-- 98 cents for the dough
(add in grated cheese for the top and you probably have another .75)

I always purchase a few blocks of gourmet cheese each month when we do our grocery shopping so we can have yummy cheese to put on top of pasta dishes, or in Huevos Rancheros and salads.
It really is economical
to purchase cheese this way because when you grate it up,
you have A LOT of cheese to use.


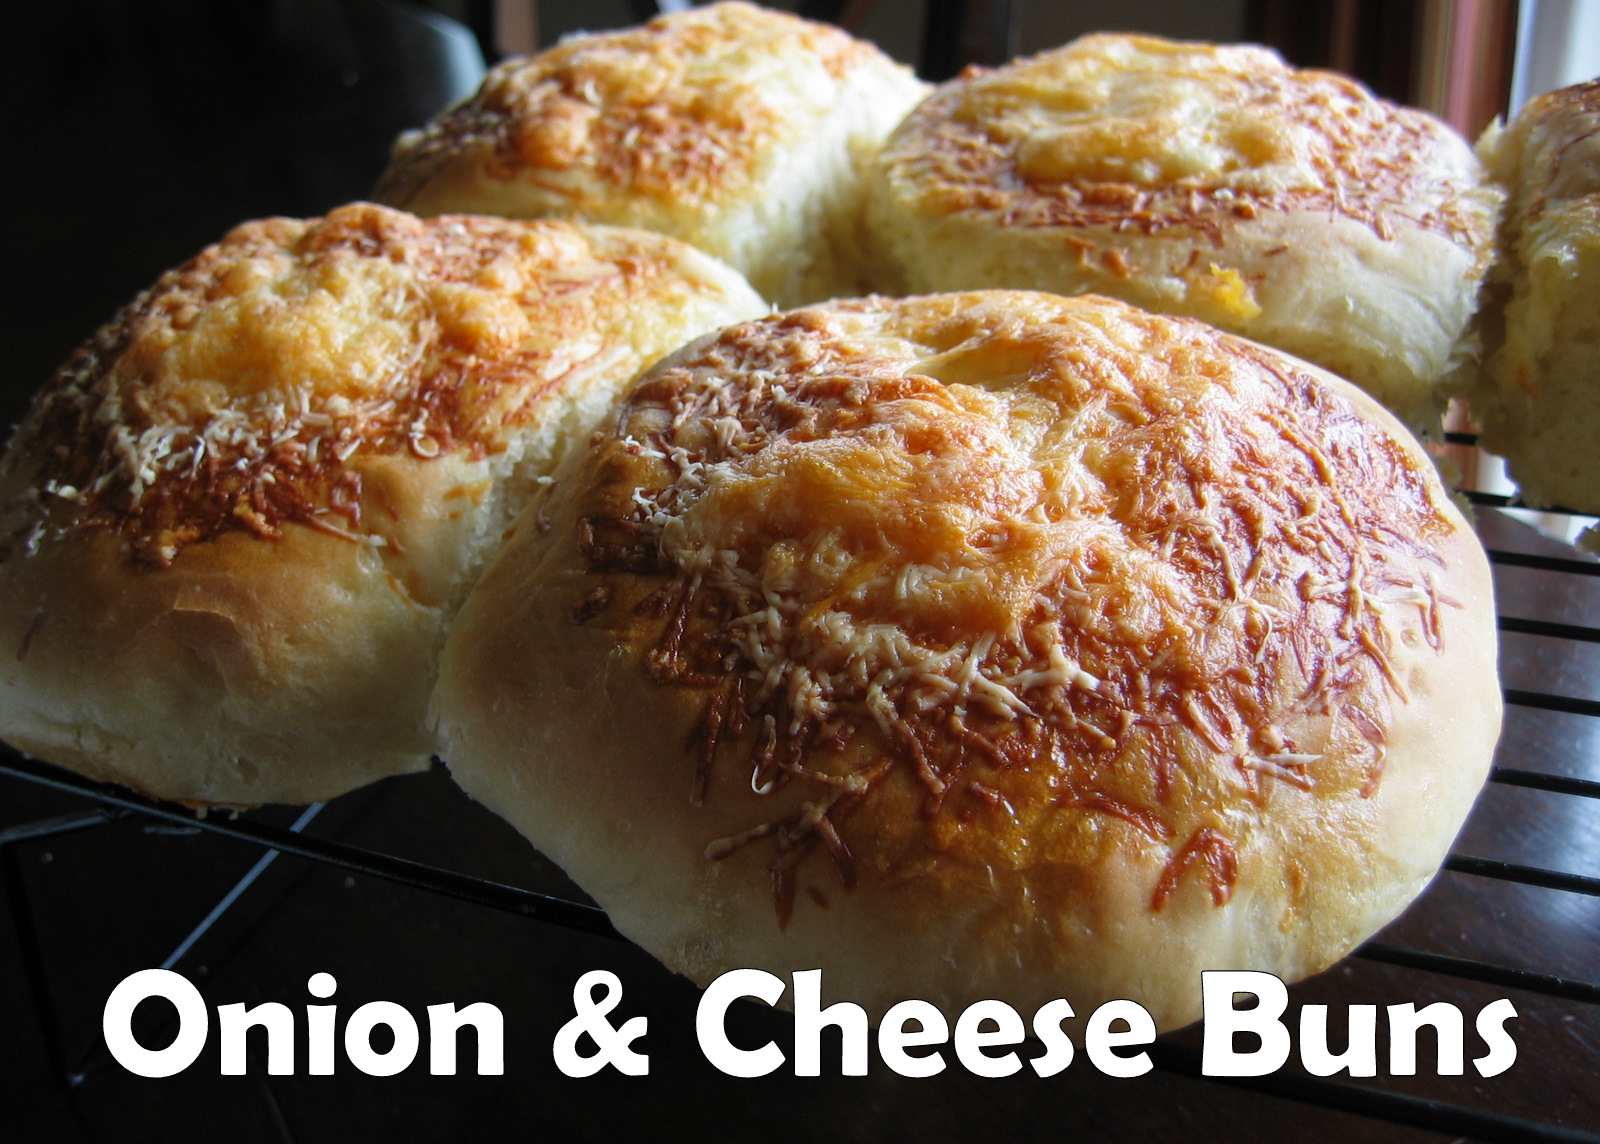
Homemade Onion and Cheese Buns
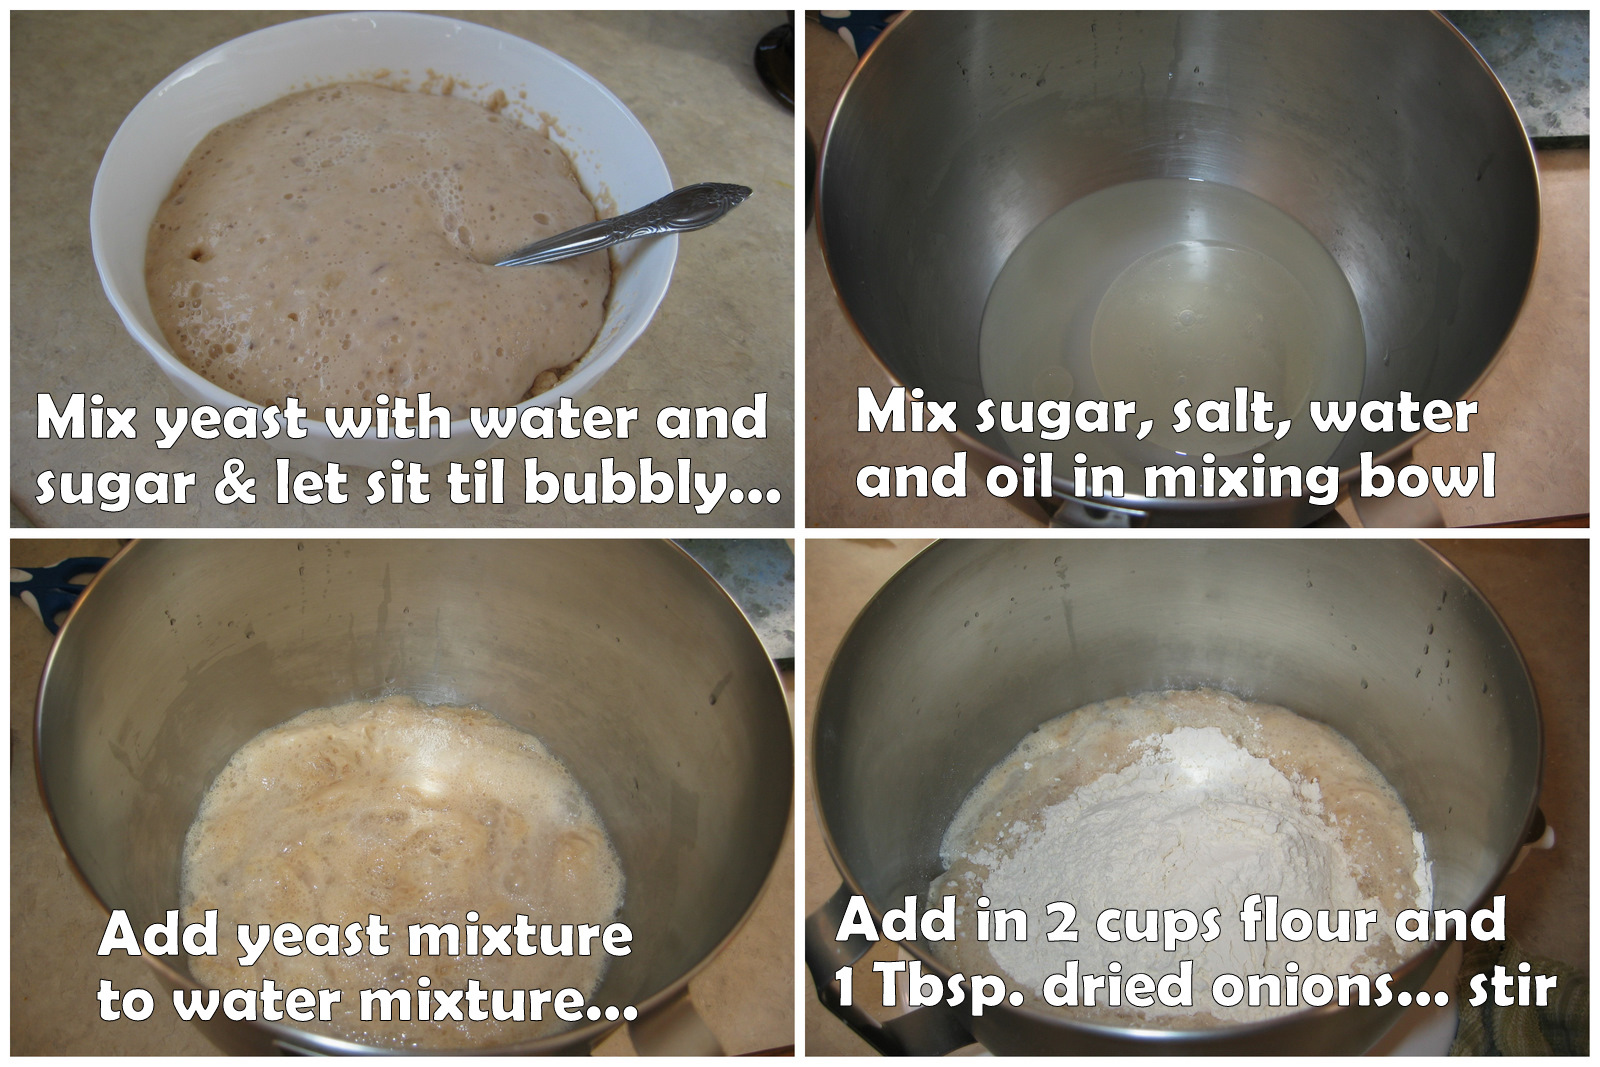
Mix and set aside until bubbly:
½ cup warm water
1 tsp sugar
2 Tbsp yeast
Mix the following together in a mixer:
1 Tbsp Olive oil
3 Tbsp. Sugar
2 tsp salt
2 cups HOT tap water
1 Tbsp. Dried Onion Flakes
Add yeast mixture to above ingredients, mix well.
Add 2 cups unbleached white flour. (this will be lumpy).
Add 3-4 more cups unbleached white flour until you have soft dough...it should be soft, not overly sticky, and not stiff (I add in 3 cups of flour and then add in more flour in 1/4 cup intervals until you have a nice soft dough)
Shape into a ball and place in a greased bowl and let rise for one hour.
Punch down every 20 minutes.
Punch down and then divide into 12 pieces
Shape into balls and place on a greased cookie sheet and let rise 30 minutes.
Punch down and then divide into 12 pieces
Shape into balls and place on a greased cookie sheet and let rise 30 minutes.
Slash top of each dough ball with a serrated knife and brush with beaten egg white.
Top with grated Parmesan & Asiago Cheese (or whatever cheese you would like)
Bake at 350 degrees until golden brown (35 minutes)
Cool on baking rack and ENJOY having gourmet buns to use for burgers and sandwiches!
Top with grated Parmesan & Asiago Cheese (or whatever cheese you would like)
Bake at 350 degrees until golden brown (35 minutes)
Cool on baking rack and ENJOY having gourmet buns to use for burgers and sandwiches!

Now you have one more "mad skill" you can add to your life that is SO yummy and most of all EASY to make,
better than anything that you could purchase at the store
and you know exactly what is going in the dough for ingredients...no preservatives, or chemicals.
Just basic food storage ingredients!
Enjoy impressing your family today, with amazing, delicious buns!
Enjoy impressing your family today, with amazing, delicious buns!


